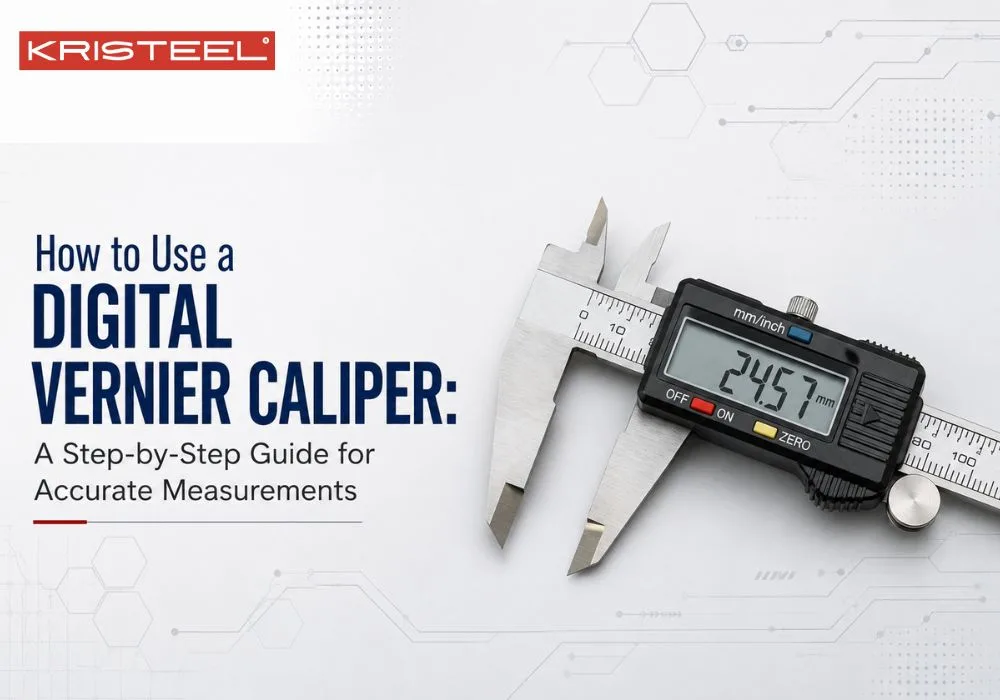
A digital vernier caliper measures external, internal, step, and depth dimensions to a resolution of 0.01 mm and displays the figure on an LCD, removing the need to count scale divisions manually. Machinists, inspectors, and workshop technicians rely on that clarity every shift. This guide covers how to use a digital vernier caliper correctly, from the first zero check to the final reading. Beginners and seasoned operators will both find practical detail here.
What is a Digital Vernier Caliper?
Analog calipers ask the operator to align a vernier scale against the main scale and read the coinciding line, giving a least count of 0.02 mm. Digital vernier calipers replace that judgement with a capacitive linear encoder printed along the beam. The LCD reports 0.01 mm steps directly, and most 0 to 150 mm instruments hold ±0.02 mm accuracy.
Layout stays consistent across brands. Outer jaws grip a workpiece from outside, inner jaws open inside a bore, and the depth rod extends from the tail. A thumb wheel sets closing force, and the zero button resets the display anywhere along the beam.
Key Parts You Should Know Before Measuring
Each component fulfills a distinct operational role. Knowing which surface comes in contact with each workpiece prevents most errors, a discipline that carries across every precision measuring instrument on the bench.
Outer jaws: The long lower jaws close on shafts, plates and bar stock to record external dimensions.
Inner jaws: The upper knife edges spread inside holes, slots and grooves, reporting bore diameter without any separate correction factor.
Depth rod: A thin blade extends from the beam tail, seating on the rim to measure blind holes.
Main beam: Hardened stainless steel carries the encoder track and printed scale, so surface damage here affects every subsequent reading.
LCD display: Four keys handle power, zero, unit conversion and hold, keeping the last figure visible after withdrawal.
Step-by-Step: How to Use a Digital Vernier Caliper
Follow the sequence below in order. The same discipline applies to micrometers, though a caliper punishes a skipped zero check far more visibly.
Step 1: Clean and Zero the Caliper
Wipe both jaw faces with a lint-free cloth. Coolant residue alone shifts a reading by 0.01 mm. Close the jaws fully and hold them against a light source, since any gap you can see through points to dirt or a burr on the contact faces. Press the zero button and confirm the display reads 0.00 mm.
Step 2: Select the Correct Jaws for the Feature
Match the jaw to the feature. Outer jaws handle shafts, plates and bar stock; inner jaws open inside bores and slots, and the depth rod drops into blind holes and recesses. Close the jaws with the thumb wheel until you feel firm contact, then stop. Forcing the slide springs the beam and costs you 0.03 mm of accuracy.
Step 3: Read the Display and Switch Units
Press the data hold key while the jaws still sit on the part, so the figure stays on screen after you withdraw the caliper. One tap of the mm/inch key converts the same value. Record the reading immediately. Record the reading before placing the instrument on the bench. Logging figures later introduces transcription errors into the inspection report.
Step 4: Watch for the Errors That Skew Readings
Angled placement inflates a diameter by 0.02 mm to 0.05 mm, because the jaws span an elliptical section rather than the true circle. Grit on the faces does the same damage. Grip the beam instead of the jaws, hold the caliper square to the surface, and take every measurement twice from different positions.
How to Read Digital Vernier Caliper in MM and Inches
 Press the mm/inch key once and the display converts the held value without any manual arithmetic. A reading of 12.45 mm becomes 0.4900 inch, since inch mode resolves to 0.0005 inch steps rather than the 0.01 mm shown in metric. Read 12.45 mm as 12 whole millimetres plus 45 hundredths.
Treat the last digit as resolution, not accuracy. Anyone learning how to use a digital vernier caliper on inspection work should record the figure exactly as displayed and round only at the reporting stage, because rounding twice moves a borderline part outside tolerance.
Tips for Accurate Measurements
Accuracy drifts over time, and a few habits keep a caliper reading true through years of use rather than months.
-
- Replace the LR44 silver oxide cell as soon as digits flicker, because a weak battery lets readings drift by 0.05 mm.
- Verify the caliper against a gauge block or setting ring every three months, and after any drop onto a hard floor.
- Store the instrument in its case with the jaws closed lightly and the display switched off to save battery life.
- Let the workpiece and the caliper settle at 20 degrees Celsius before inspection, since steel expands 11.7 micrometres per metre per degree.
- Close the jaws using the thumb wheel only, because finger pressure on the slide varies from one measurement to the next.
- Never measure a part while it rotates in a lathe or while it remains hot from machining.
- Zero the display at the start of every batch instead of trusting the setting from the previous shift.
Conclusion
Clean measuring jaws, accurate zeroing, and square contact ensure repeatable readings across all components. Practise on parts of known size until your figures agree within 0.01 mm. Kristeel has manufactured precision measuring instruments, engineering gauges and tools from Mumbai for over five decades. Explore the Kristeel digital caliper range to match the resolution your inspection work demands.